
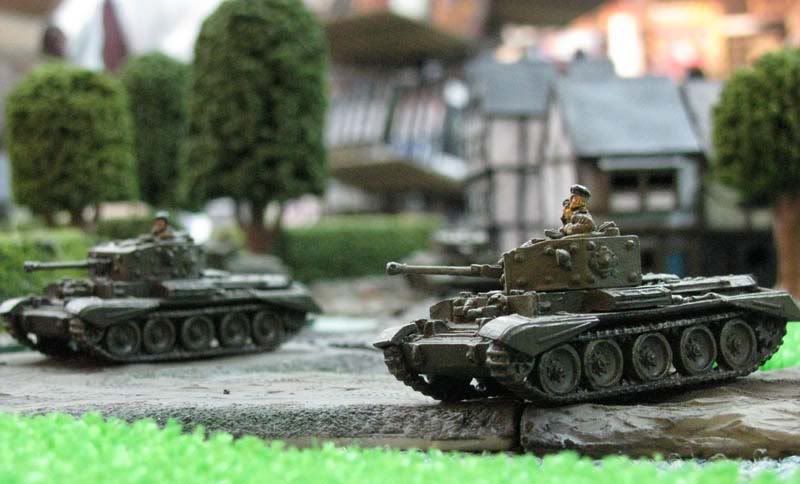
Cromwell IV
Manufacturer: BattleFront Miniatures
Product Code: BR????
Date of Article: 05 Nov 2008
Description
The Cromwell was a late war British design, but in terms of numbers, the tank was overshadowed by the ever-present Shermans. A speedy design, the tank actually had to be governed so that its speed does not damage the suspension. However, it was not well received initially (at least by the 7th Armoured Division), mostly because the tankers didn’t like having to learn a whole new tank just shy of the Normandy invasion.
The initial main armament was a 6 pounder gun, but the 6 pounder is increasingly unsuitable as enemy armour progressively got thicker. Boring out the 6 pounder to 75mm gave the tank more flexibility, as it retains AT capabilities (the 6 pounder was roughly 57mm) while giving it more options for infantry support, and logistically it made supply easier by utilizing a common round with the large fleet of Shermans.
The Cromwell turned out to be a short-lived design, going into main production shortly before Normandy, but being largely replaced by largely by Comets (with their larger, detuned 17 pounders) towards the end of the war. Ironically, as the Comets didn’t have a close support version, the Cromwell CS actually managed to last longer than the basic Cromwell.
Fenders
The Cromwell’s weak design spot is in the fenders; as separate pieces, these add 4 more to the item count, making the Cromwell one of the more complex miniatures to put together (a minimum of 12 parts).
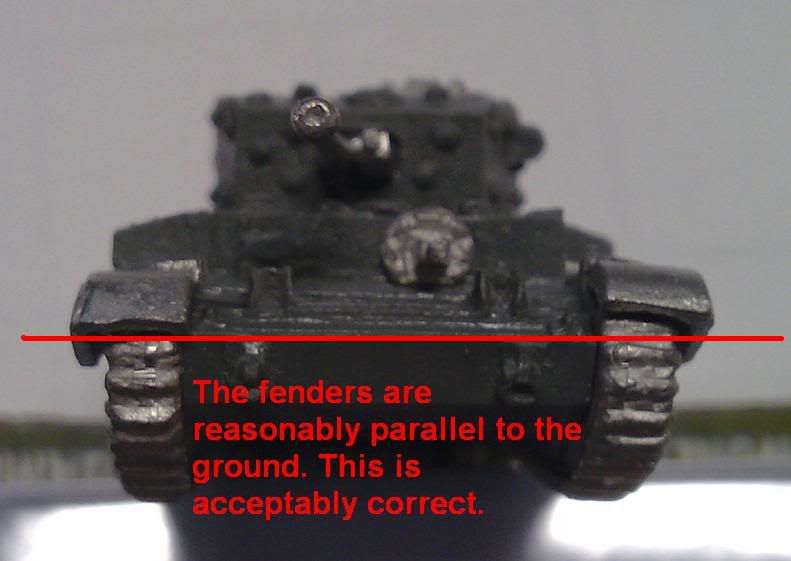
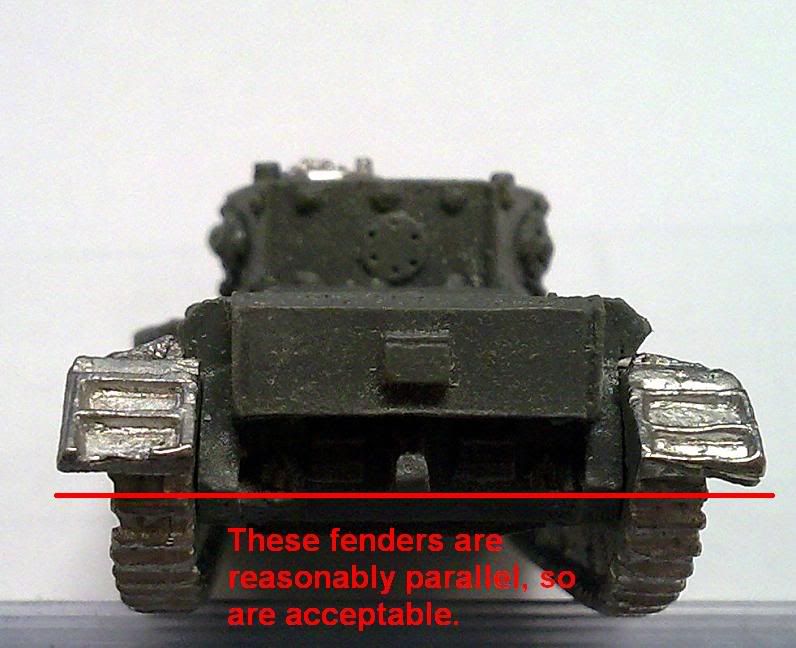
The foward fenders are also tricky to attach, as they are supposed to be flush with the top of the hull, but there happened to be a strut/ support in the front right where BF had the fenders. This can lead you to attach the fenders at an angle, which was precisely what I did for the Cromwells in the photo above. This makes it look as if the fenders are bent, which might not be the look you want, but is still servicable. The two photos below illustrate the point:
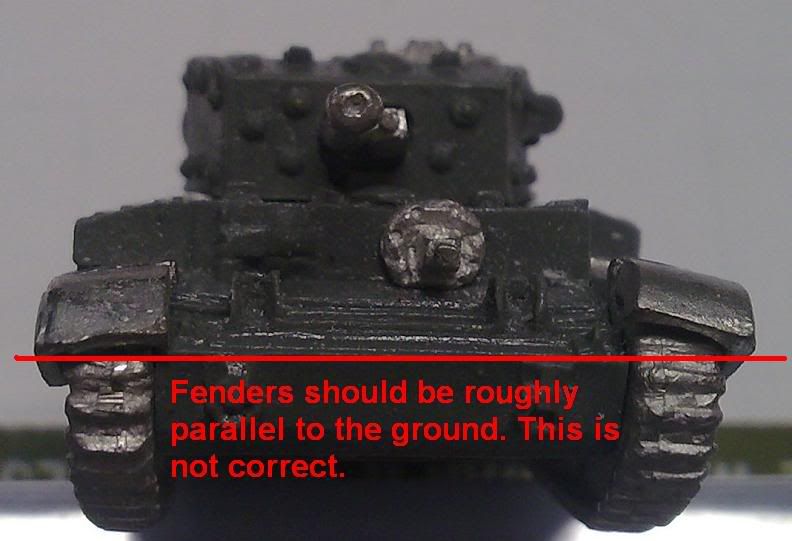
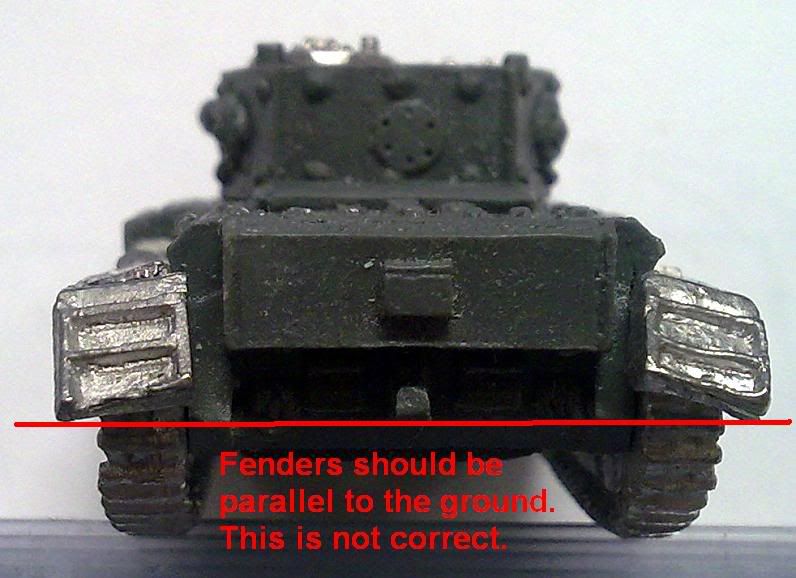
The correct positions should be as follows:
The tendency is for the left front and right rear fenders to be a bit crooked. The right rear is more positional than anything else, but the left front is due to part of the track link being too high, and forcing the fenders up and out:
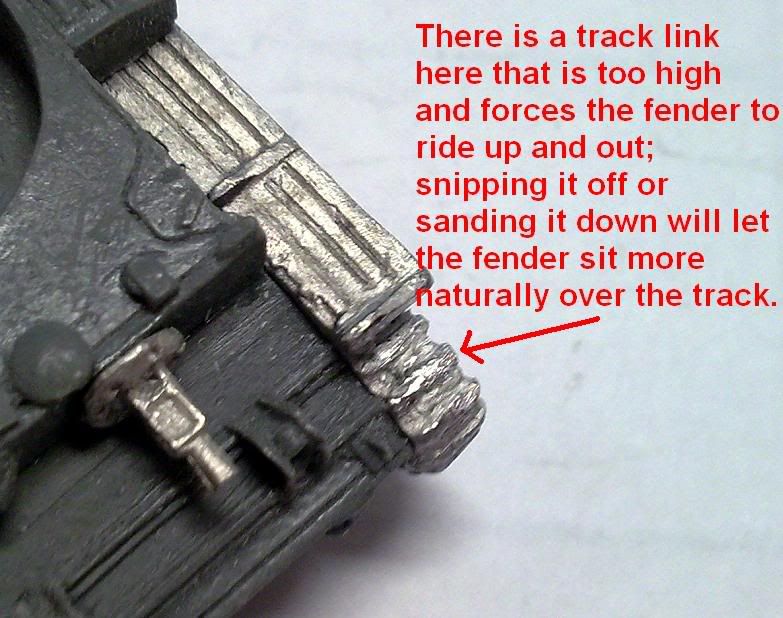
As noted, a quick snip and sand would alleviate the problem.
In addition, attaching the fenders before painting makes it easier to handle, but unfortunately the fenders make it hard for you to paint the portion of the tracks directly underneath the fenders. Not impossible but definitely not going to expect great art if you do this.
Since fenders are very prone to being torn off, you can leave it off, but the Cromwell looks a bit naked without its fenders…
Tracks
The tracks of a Cromwell are not terrible, but with a couple of things to watch out for. In terms of assembly, there’s not much to guide you, so there’s three points I use as a guide.
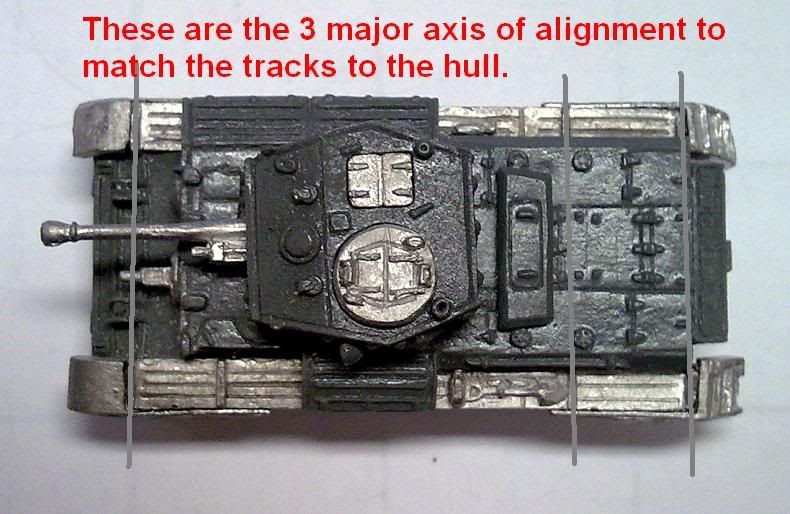
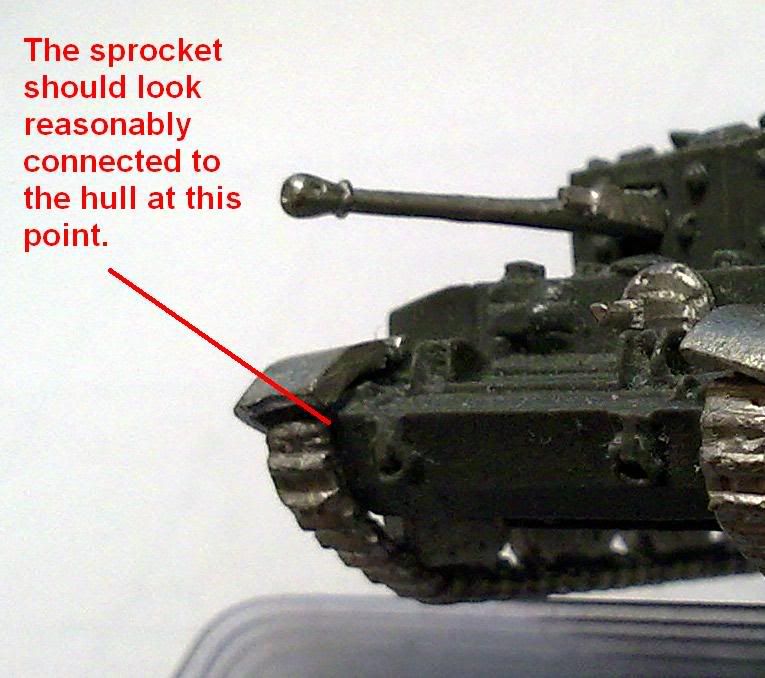
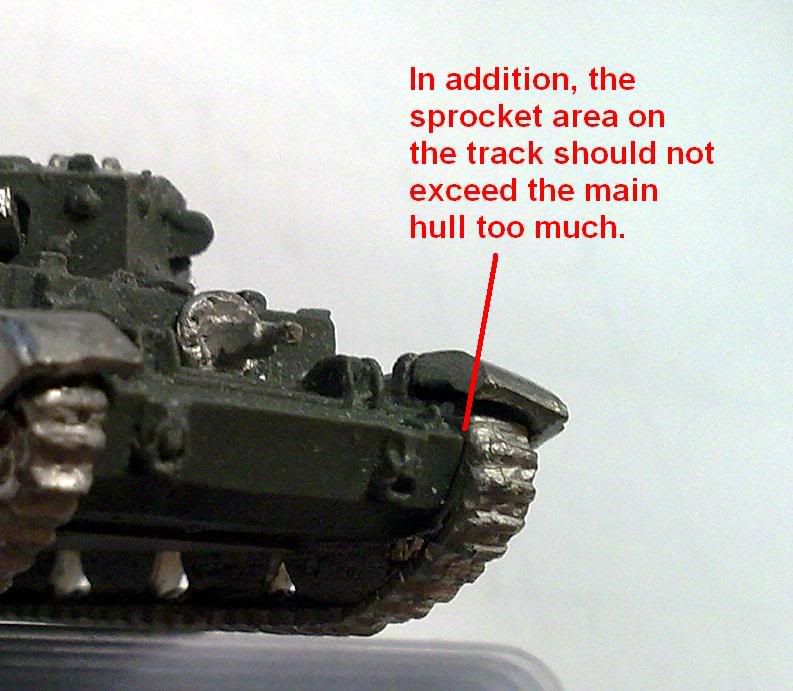
The first is at the front hull; there’s a raised line running across the front of the hull that I use to align the tracks with the hull. I also use the side of the hull vs. the drive sprocket; the sprocket should not stick out too much.
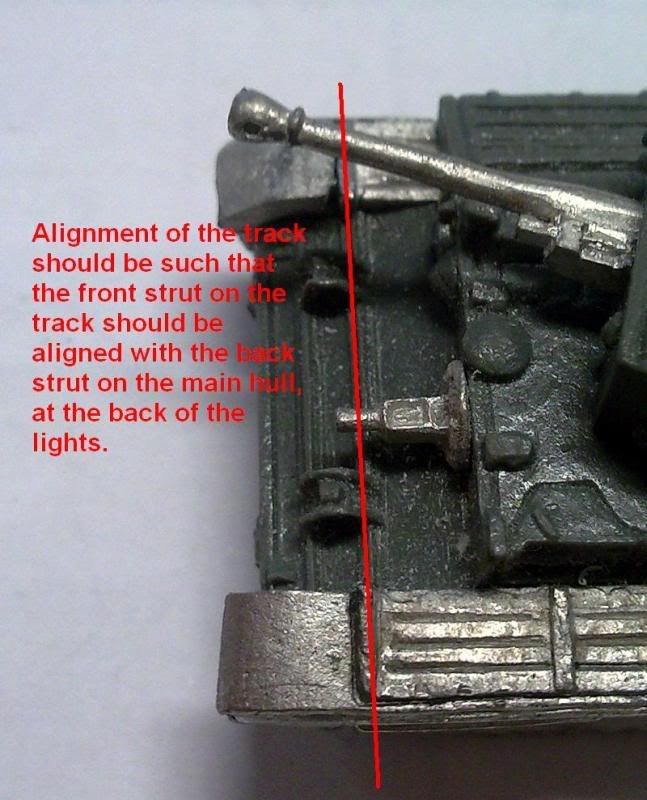
The second and third are on the side of the hull; there is a particular spot on the top of the tracks that can be used to match up against a support post on the side of the hull:
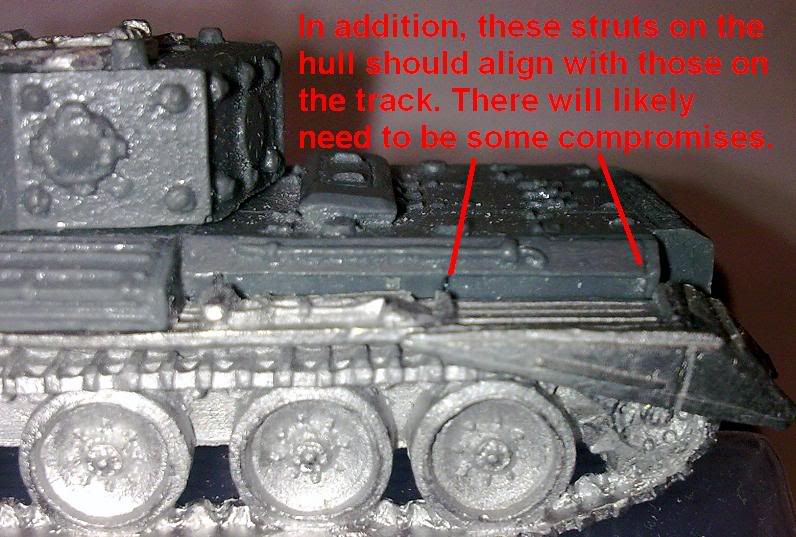
Both can be used to ensure the tracks are aligned properly. However, you do have to exercise judgement using these two, as they sometimes don’t work out due to variations in the casting process.
The tracks also “toe in” a bit, so you might want to adjust for this by shimming the tracks a bit.
Another thing to know is that Cromwells apparently had rubber tires on the road wheels, so they would be black. The two Cromwells above did not have this reflected.
Turret Hatches
Turret Hatches on the Cromwell are painted, both inside and outside, as per the hull colour. The hatches on the Cromwell are not exceedingly complicated; the Commander’s hatch is notched and can only be placed in one way, while the loader’s hatch is symmetrical and hence not an issue.
There are no separate hull hatches.
Normandy Cowl
It was found that water could get into the exhaust of the Cromwell and create issues; as such, some Cromwells were fitted with a cowl over the exhaust to reduce the potential. This cowl is a curved hood which is placed at the rear of the Cromwell, redirecting the exhaust from vertical to horizontal, away from the tank.
Neither of the Cromwells above have Normandy Cowls.
Cromwell CS / Centaur
The Cromwell CS was a variant of the Cromwell that replaced the 6 pounder/ 75mm gun with a 90mm close support gun. This is a shorter gun with a counterweight at the end of the barrel (as opposed to a bell-shaped muzzle brake on the 75mm), making this varient very obvious. The Coax BESA MG appears to be removed on the CS version.
The Centaur is an early variant of the Cromwell that has a different engine, and did not have the hull BESA MG; the MG opening was covered up with a circular (or conical) plate that comes with very Cromwell. The main gun has also been replaced by the 90mm CS gun. This variant is primarily used during D-day and the immediate days afterwards, and was crewed by Royal Marines, not Army. These were eventually turned over to an army unit, but was to the best of my understanding was not utilized beyond Normandy.