When you absolutely need to level a city block. Or two.

Warning: large numbers of images after the jump.

Some of you would have seen this before, this is more a reshoot and transfer to this blog.

When the Ork Bommer was released, the kit basically sold itself to me. The basic sculpt, the options, all appealed to the modeler in me. So I go a pair and bashed one box up:
20130121-124959.jpg
You might notice some modifications… Here’s a list, from nose to tail:
Continue reading

Talon vs Nephilim

When I first heard about the Dark Talon/ Nephilim, I thought that it would be more of a Storm Talon variant. Initial photos do sort of bear it out.

But breaking the box, it soon became apparent that the Nephilim isn’t a Talon clone.. More a cousin.

20130117-194638.jpg

As you can see, the Nephilim is significantly longer, wider even without the wings. Engine pods were Talon pods.. Then someone went to tweak little details. Engine exhaust was Talon exhaust, but combined and simplified — the Talon exhaust was terrible as the see through vents gave room to install the exhaust wrongly and if you are picky, required subassembly painting before final fit.

Rear landing gear was eliminated on the Nephilim, and the whole upper hull was redesigned — the two kits have the same cockpit but the upper hulls are not compatible. There are some parts compatibility, but that’s more by accident then design.

Which is puzzling because why would GW spend money to tool a kit that has low compatibility? Particularly for the Dark Angels, which is popular but not great in the fan base. The lack of options in the Nephilim kit is a bit unwelcomed, especially once I realized how much option was available in the Talon kit. Ugly as it might be, but it does give you plenty of options.

I initially bought a Talon kit partly to see the fuss and partly as a hedge for the new Dark Angels codex. As it happened, the hedge failed, but I’m not too unhappy; I’m going to use the Nephilim kit to build a Nephilim, then use the leftover parts with the Talon to create a new Dark Talon.

Destroyer, compared

Let’s have a bit of fun here:

20130114-130950.jpg
Went to spray the Destroyer. And you get a comparison pic. πŸ˜‰

To the left is the 28mm Heroic Destroyer Tank Hunter. To the right is the Targa 1/48 Tiger. Basically the Destroyer is the size of a Tiger, with more overhang for the laser…

And yes, that is a Beetle husk In front of the Destroyer. That is a Tamiya 1/48 Volkswagen, cute kit. About the size of your average compact, so you now have a peacetime reference to the size of these tanks ‘IRL’.

Incidentally used Army Painter Uniform Grey over a Chaos Black undercoat. Not too bad!

EDIT: because I can’t tell my left from my right… πŸ˜›

Refitting the Destroyer

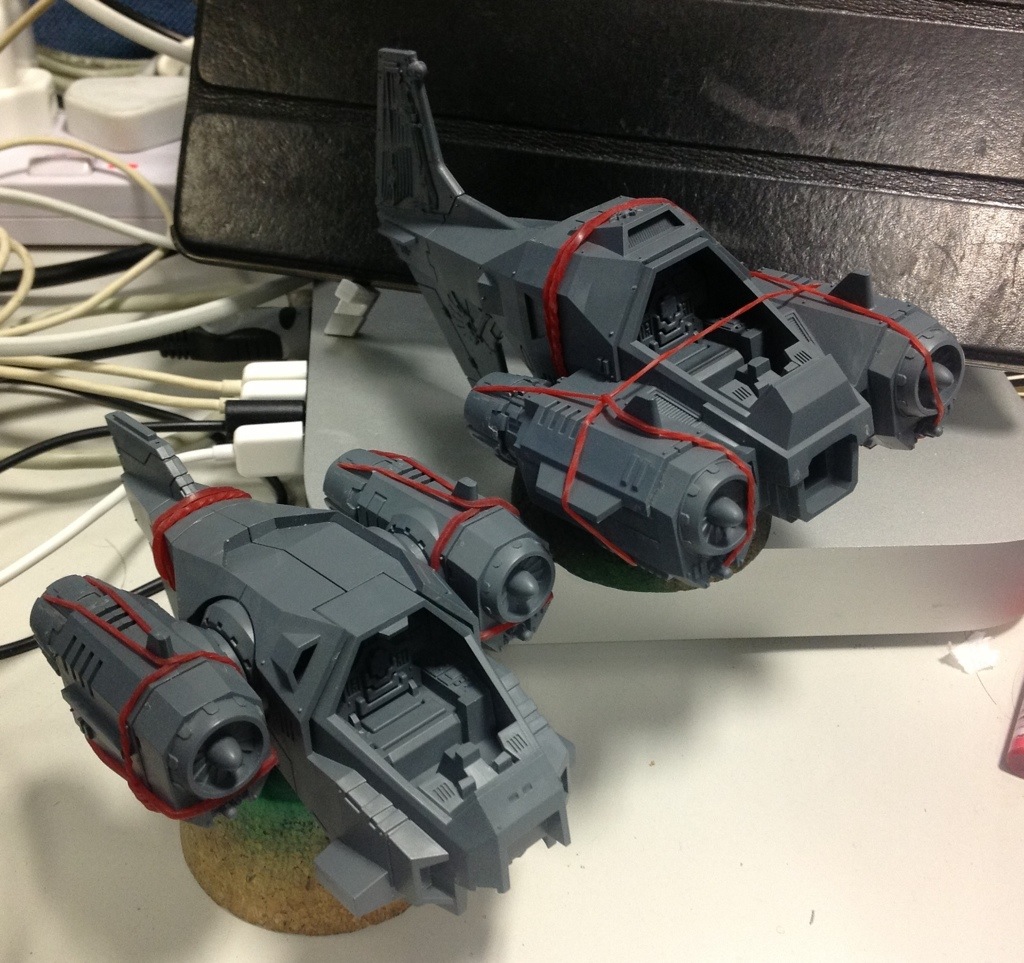
Putting together the Destroyer isn’t all smooth sailing. This is an early Forgeworld product and the fit… Is a bit lacking. Either that, or the years in storage has warped the solid chunk of resin bad.

20130113-213824.jpg

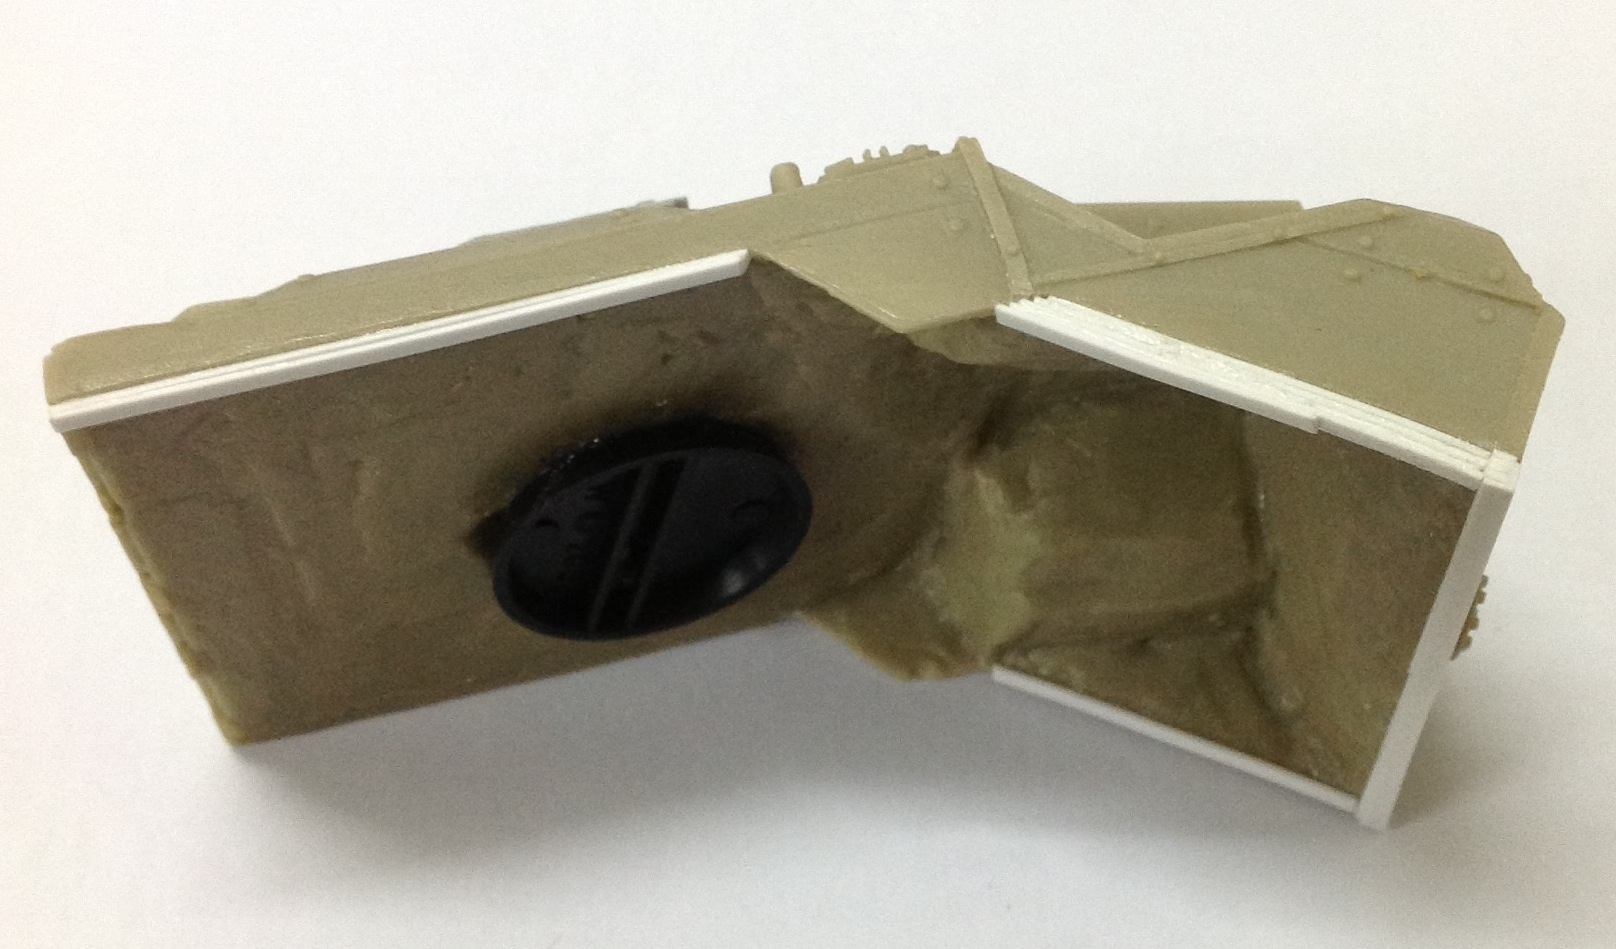
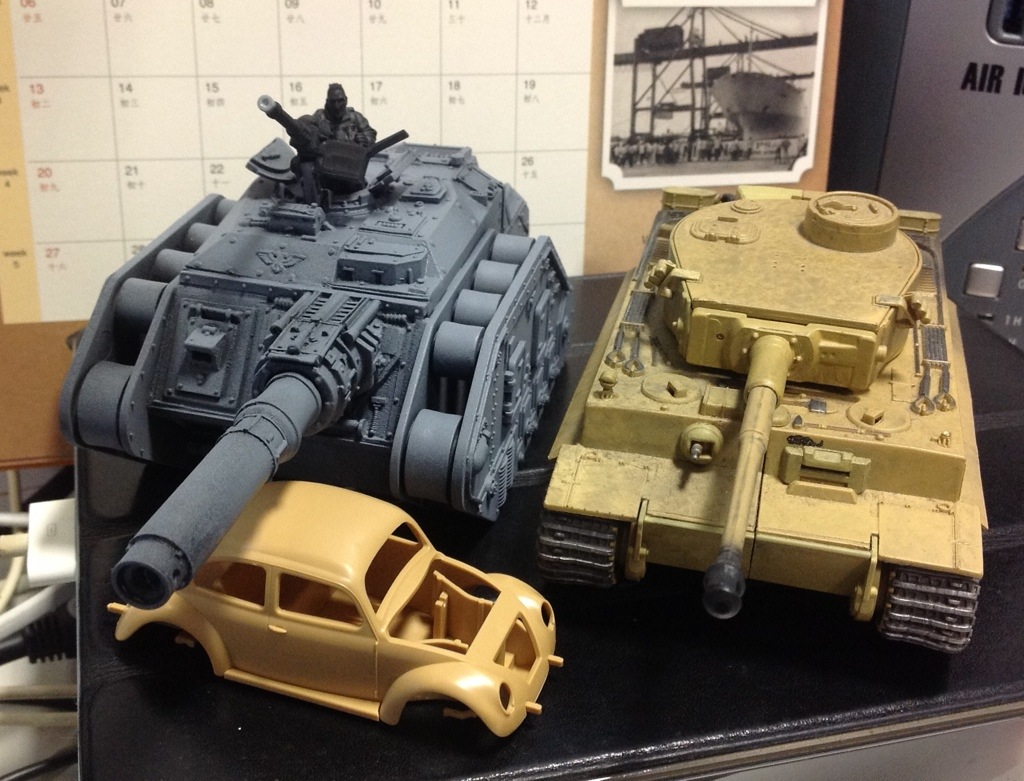
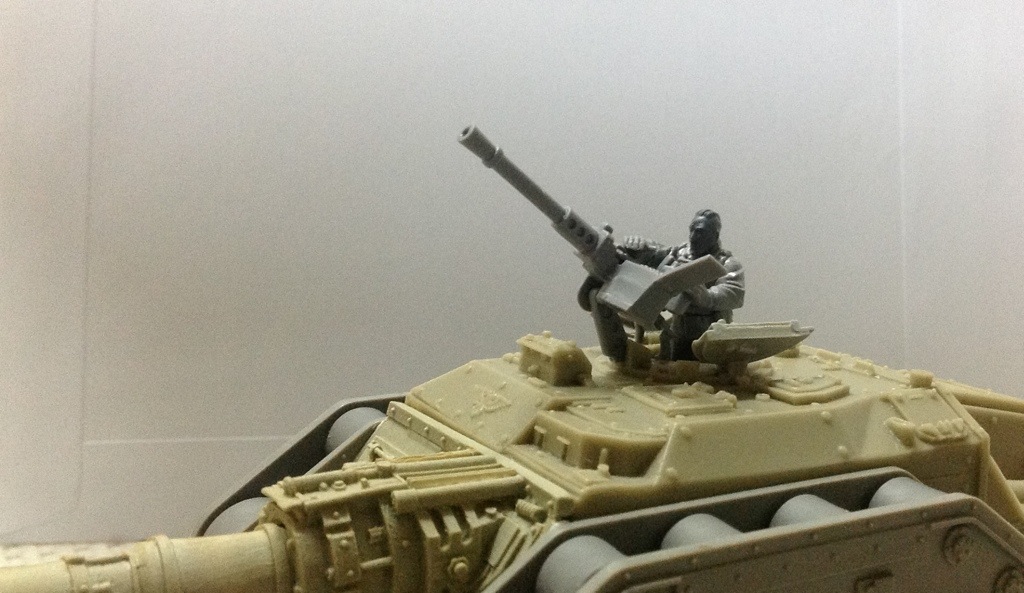
Here is the underside/ inside of the Destroyer hull, you can see the thickness and roughness of the cast — FW has since improved tremendously. Each white strip is a styrene spacer, I had to add them to level out the upper hull with the plastic Leman Russ tracks. The black base is just a place to glue the tank commander on.

Not only was these adjustments necessary, the back plate connecting to the bottom of the hull needed a lot of tinkering. Basically, there’s no way to fit it. At all. Wasn’t long enough to reach both sides of the hull, neither did it had much connectivity with either the hull or the top… Messy. Had to use a Tamiya corner wedge piece to get the necessary ‘bite’.

Not to mention the front glacis plate…

20130113-213833.jpg

Uh where do I start? Plate was short… On both sides. So you see a plastic strip on both sides as spacer and that made the plate unable to clear the rivets on the front hull — you need to slide and reposition the front plate between the rivets. It wasn’t terrible because that meant it had a good fit.

Then the entire plate was warped. Some weird geometry there, with both lower corners curling up and away. The resin plate was so thick, there’s no practical way to warm and reset the plate — I’ve tried. Ended up I just placed a blanking strip in front of it… You still can see where the lip curled up a bit beneath the blanking strip. Contemplating whether to rivet the plate for a consistent look. I’m not a big fan of riveting…

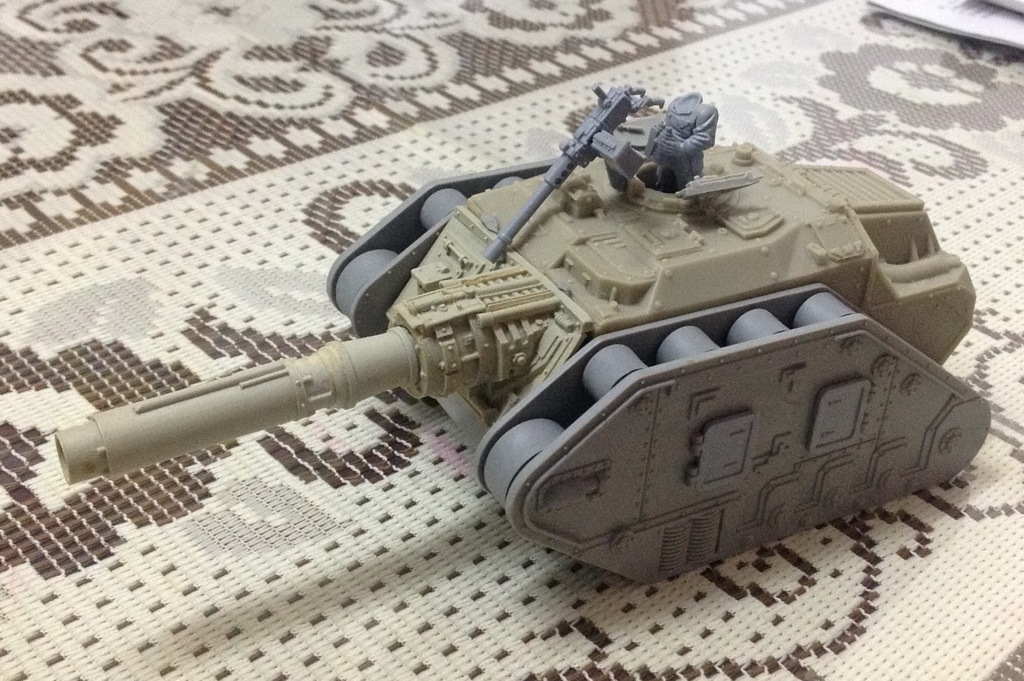
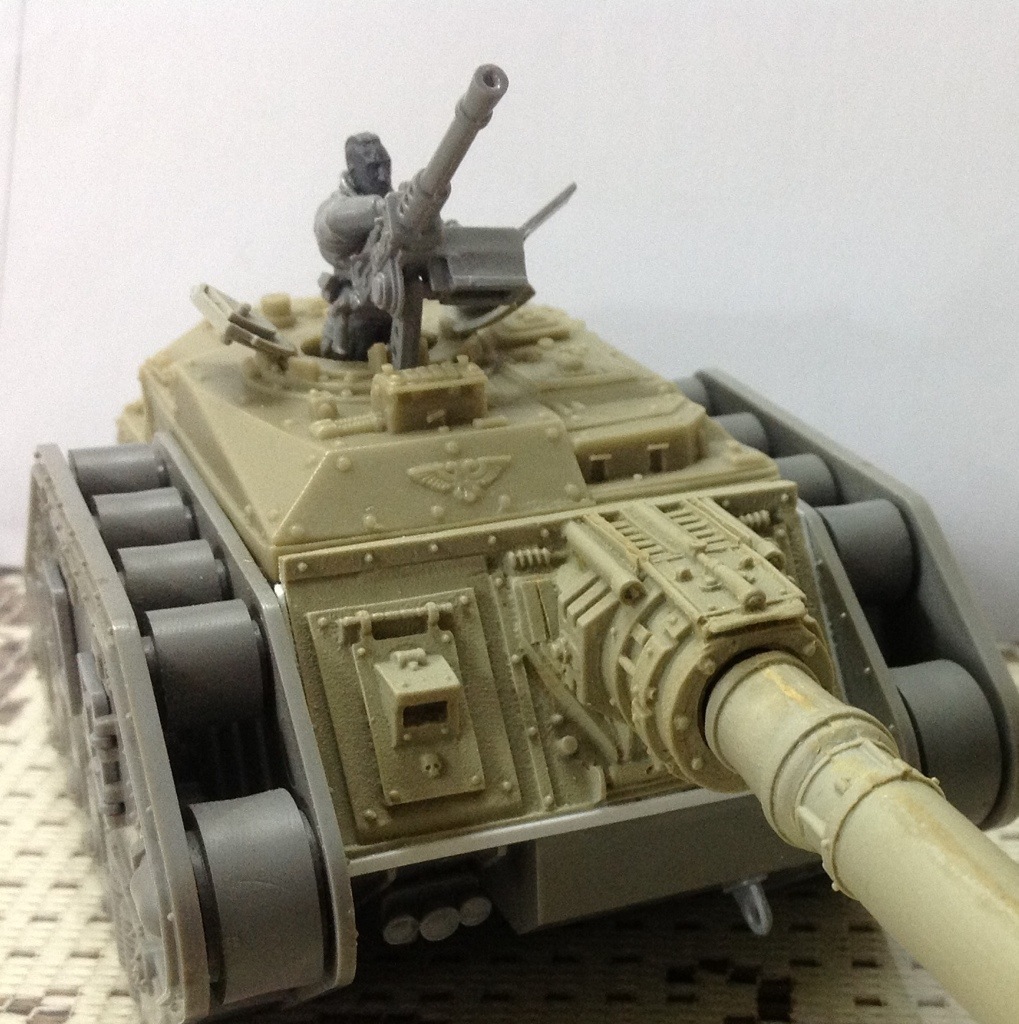
But finally, the adjustments are done, she fits more or less. Still need to putty in the cracks in some places, but she’s good for the priming and initial coat.
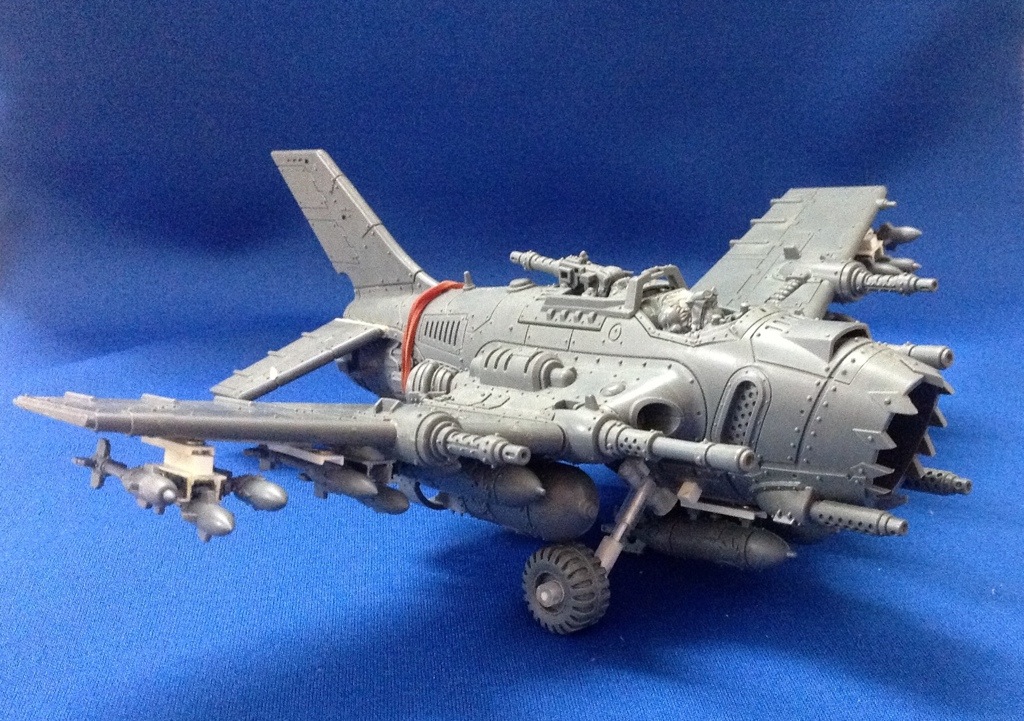
Sometimes, the mini finds you…

20130112-191618.jpg
Yeah, somewhat obsessed with this one today.

Was looking around for a suitable tank commander, but nothing quite fit the constraints.. Forgeworld stupidly fitted the pintle mount right at the front, blocking vision. Then I popped a Cadian command squad, saw the head with the sharp features, decided to use it. Couldn’t use infantry arms (they have shoulder pads which would be unsuitable in a tank), so went back to the Demolisher kit.

Turns out the arm flagging forward was just rightish to drape over the stubber if I pointed it skywards, and the bino just had the right fit… Some days, you look for a mini to fit. Others, the mini comes to you.

I’m going to name this tank ‘Patriarch‘. If I ever do a proper display, I’m going to call it ‘Patience of the Patriarch‘.

Something on a Lazy Saturday Morning

20130112-130400.jpg

Something that literally has been in the stable for years. Finally a concerted push to get it done. Probably will do it in German Grey — I normally default to dunkelgelb for armour, would like a different approach. And I think I got spray for that colour too…

Need to find the right parts for the tank commander.

Introducing The Factory

I wank around various scale miniature gaming systems quite a bit, so inevitably I have to assemble miniatures. I actually enjoy doing that…. that’s why I still do it.

One challenge is that sometimes, the way a manufacturer puts kits together is.. less than ideal. Which was why a few years ago I started a wiki trying to document how I put together some minis, with special emphasis on odd spots, fail points, weird shit.. you know, the usual nonsense that comes around in kits. But that wiki basically petered out. It was a bit of hassle to keep it updated.

Fast forward to 2013 and now I have a lair. So why not just transplant it over? I found the wiki again, and basically is in the process of transferring the content over. So, here’s introducing The Factory. πŸ™‚

First article I have transplanted is how to put together Battlefront’s 15mm Cromwell tankΒ for use in their 15mm game, Flames of War. Thankfully, I used a picture host instead of uploading to the wiki back then, which makes my life a lot easier when transplanting these articles.

Seems like the plugin/ app I used to connect this blog with the FB page isn’t working on pages, so I’ll have to blog the updates as I put them in.

A Riveting Kickstarter.

20130111-071207.jpg

So, I’m supporting this Kickstarter:

http://www.kickstarter.com/projects/coolminiornot/rivet-wars

Rivet Wars. I’m not a big boardgamer, usually I go for a boardgame either for its WWII roots (I got some ASL-like games) or for the minis. This one is a bit if mix of both… But definitely the minis are cute.

The addition of Babydoll (Suckerpunch), Nick Fury (Avengers) and Rocketeer parody heroes is an interesting touch. πŸ™‚ I liked Suckerpunch and hey, it’s Samuel L. Jackson.

Letting the rest drive the amount up for now; I’ve put in the minimum amount for what I want but want to see how the options develop.